 Below is a list of "Unwritten Rules" that should be observed by any photographer that respects himself, and wishes to be respected by his clients and fellow photogs. I'll even throw in a few, about people that deal with photographers, for good measure ;)
Some are serious issues, others less, and mostly about etiquette, but all of you will agree that common sense should prevail! YES, I have witnessed all of these first hand, and NO, I won't be mentioning names. (Don't even ask)
1. Don't mix up Passion for Profession!
Having a DSLR camera and taking pictures doesn't make you a Professional photographer. Making Photography your Profession and main source of income, gives you the right to title yourself as a "Professional". If most of your "work" is taking images of your pets, family members, or accepting contracts free of charge, it makes you a hobbyist. There's nothing wrong with being a hobbyist, unless you are offering your products & services for free, to people who should be paying. Although you may be quite good, and very passionate about photography, you are still going against all rules of business. Have you ever seen a plumber offering his services for free, because he was passionate about leak-free pipes? Neither have I. Respect the industry, and those who have been doing it as their main source of revenue, and charge a fair market price for your work. PS... $59 for a 2-hour shoot with 6 touched-up images, is NOT considered to be a fair market price!
2. Blend in, and be as less visible as possible!
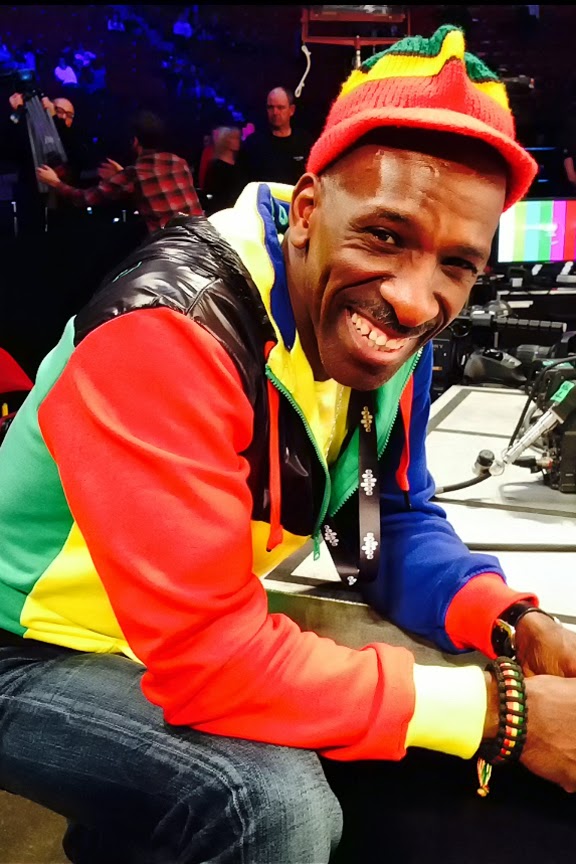 If shooting a concert from a pit, boxing gala ringside, or a team sport from the sidelines, you should acknowledge this privilege by respecting the artist/players, and dress to be as conspicuous as possible. The crowd didn't come to the venue to see you. Most importantly, the "Main Attraction" surely doesn't need the distraction of your brightly-colored or fluorescent shirt. Wear dark colors, and be part of the shadows. Your clients, co-workers (and the talent) will appreciate you for it. Wearing bright fluorescent color, when shooting ringing at a boxing gala, (with live coverage on HBO), is NOT a good way of blending in. I'm thinking that possibly, our photographer friend, Herbie, hadn't gotten the memo! ;)
3. As an assistant or intern, don't distribute your business cards to the client!
This should go without saying, but personally, I don't have enough fingers on both hands, to count the times that my assistants or interns have given (or tried to give) their business cards to my clients. Really, is that how you thank the guy that hired you? What do you expect, the client to drop his supplier to deal with his assistant? Be smart, play it low key, and you'll continue to get work, instead of getting a bad rap and putting yourself on the "Don't Touch" list.
4. Photo Credit!
If a photographer has provided you with images that contain a photo credit, logo or watermark, it was put there for a reason. Don't crop it out! If you use a photographers image on a social media site, the least you could do to thank him, is make sure his photo credit and link is clearly visible. After all, these are HIS photos. I'm willing to bet, that the more exposure you give the photog in question, more perks or additional photos will come your way. What goes around, comes around!
5. Closer is NOT always better!
When shooting a Press Conference, show a little respect for others, and bring a telephoto/zoom lens. Being 4-feet away from the speaker with your arm in the air, using a wide angle lens might get you decent shots, but, it will also prevent anyone else in the room from getting any at all, (without parts of you in the frame). Bring the necessary gear for the task at hand. By the way, this is also true for you "artistic" photogs that stick a fisheye lens in artists faces during a concert. If you must do so, try to make it quick.
6. Accreditation should NOT be taken lightly!
Whatever the gig, if you've been given directions or a time-frame of what, and what NOT to shoot, follow these simple directions. Example; If you're shooting a concert and were given the first 3 songs..., you shouldn't start shooting before the first note, and stop shooting on the last note of that 3rd song. Trust me, if you don't have enough of 3 songs to get a few good pics, you have no business being there! Worst... I've seen Photogs buy themselves tickets in the first 3 rows, and shoot the entire gig with their smuggled-in DSLRs, then create fake accounts, and posting them on their site, as if "Fans" had provided the images! Yes, that's low, and it makes us ALL look bad.
7. Don't submit free images to another photogs client!
If you're covering an event for a media, don't go giving your shots for free to the end user. First, you're prostituting the market, and killing the industry (in addition to not making a very good name for yourself). Secondly, chances are, the end user has enough budget to pay for those images. Let's all take a few minutes to think about why photogs were making more income 20 years ago than today. Sad, but true.
8. If you're getting paid, pay those working for you!
This is especially true for MUA & Stylists. As a photographer, you don't expect to work for free, so please, make sure that those who work for you, are also well compensated for the great work they do. Without them, you wouldn't obtain the same results.
MORE TO COME...



 Below is a list of "Unwritten Rules" that should be observed by any photographer that respects himself, and wishes to be respected by his clients and fellow photogs. I'll even throw in a few, about people that deal with photographers, for good measure ;)
 We all agree that a photographers "Workflow" is as personal as it gets, but, that it's also project-dependent. Let me explain; In my case, I won't use the same workflow for a portrait shoot, as I would for a concert or a cultural project, and especially, a sporting event. Although some aspects of it are similar, each have their own "twist". As the delivery time-frame and project type differs, so does the level of retouching. But because several of you have asked politely, if I'd be willing to share some of my workflow "secrets", I've decided to oblige. As such, I'll provide you with a brief description of a "generic" workflow that I use on a regular basis, that suits my needs, in this case... for a concert shoot. Hope this helps!

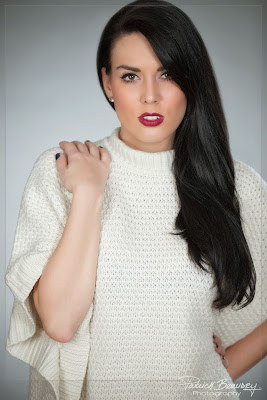
 Our portrait shoot with the lovely Mylene Lacroix, yielded some pretty awesome pics (As you can see by these preliminary samples).